Setting up shipping classes
Use shipping classes to group products based on how much they cost to ship. Then, for each of your shipping zones, assign a different flat shipping rate to each class.
For example, you might have shipping classes for large and heavy products, small and lightweight products, and small but heavy products.
This article is divided into three steps:
- Create a new shipping class (this is the container into which you will group products)
- Assign products to your shipping class
- For flat-rate shipping, set up a special rate for your shipping class
1. Create a new shipping class
- Navigate to Settings > Retail > Woo Settings.
- In the top ribbon, select Shipping, then select Shipping Classes in the ribbon below.
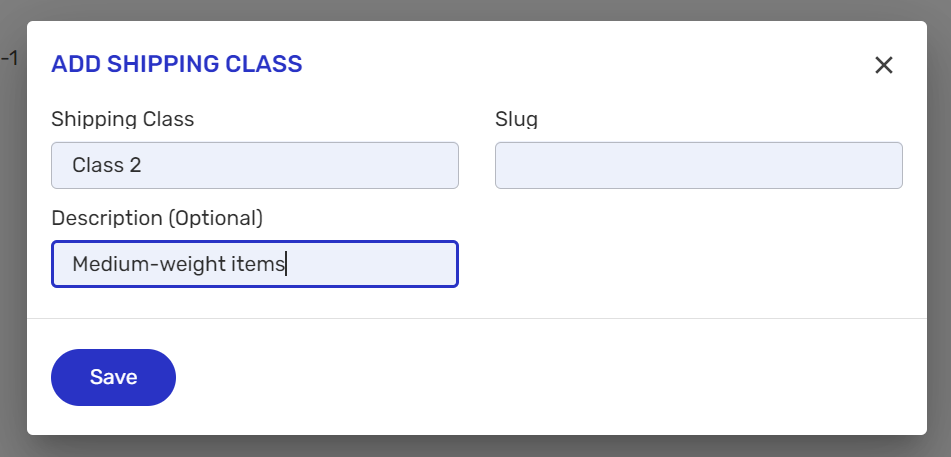
- Select +Add Class.
- Add a Name and short Description for the shipping class. You can input a Slug, or have one auto-generate by leaving the field blank. Click Save.
2. Assign products to your shipping class
When you add a new product to your store, you'll have the opportunity to assign a shipping class.
To add a shipping class to an existing product, go to Retail > Products > All Products and open the product you want to edit. Scroll down to Shipping and select an option from the Shipping Class dropdown.
 Note: You can assign a product to only one shipping class, even if the product is variable.
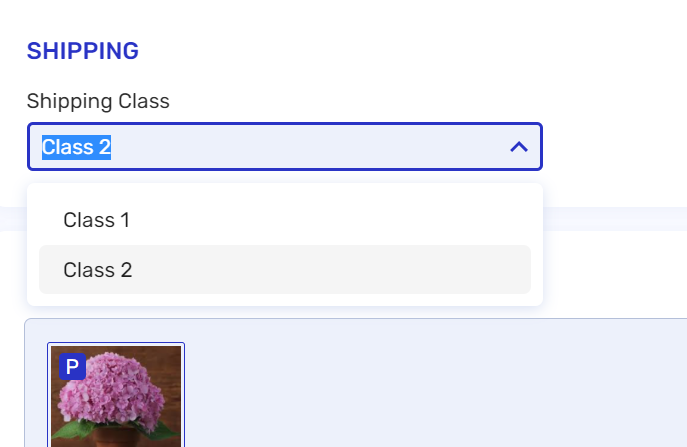
3. Set up a special rate for your shipping class
- Go to Settings > Shipping and select Shipping Zones from the top ribbon.
- Click Edit under the zone you want to adjust.
- If you haven't yet enabled Flat-rate shipping for this zone, select it from the Shipping Methods dropdown and click +Add.
If you have already enabled Flat-rate shipping, you'll need to delete in and re-add it in order to sync it with your shipping classes. Just click Delete under Flat rate, then select again it from the Shipping Methods dropdown and click +Add.
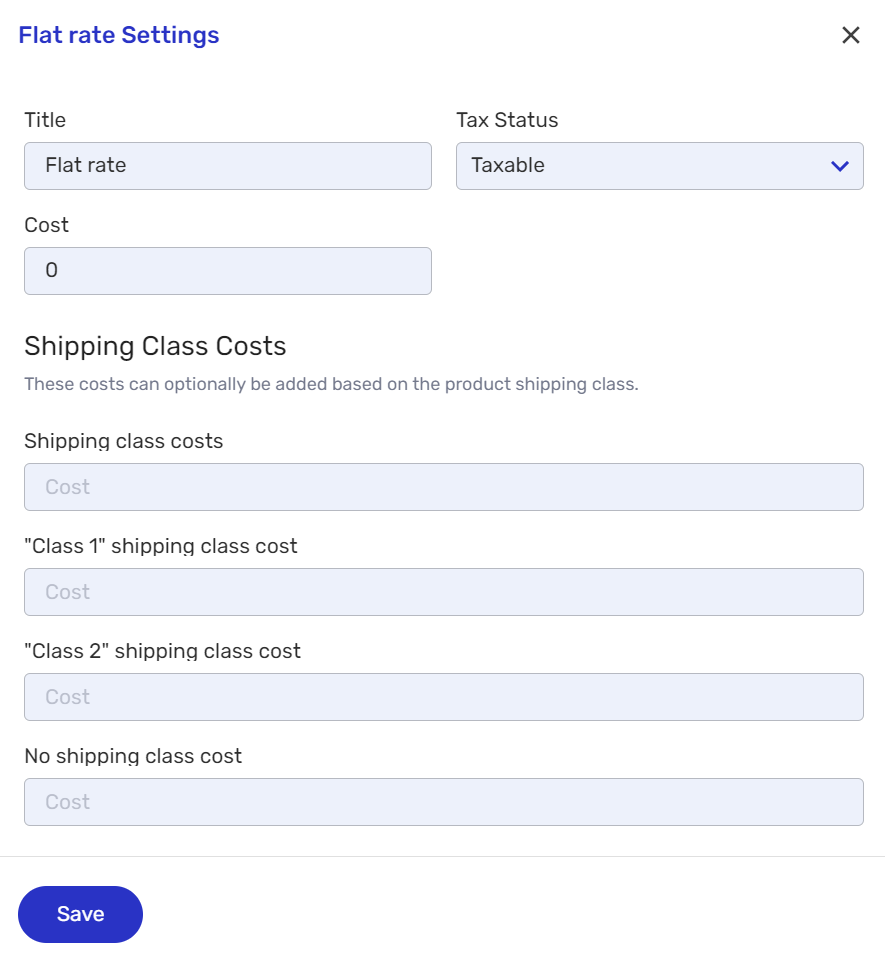
Click Edit under Flat rate to bring up the Flat rate Settings popup. Under Shipping Class Costs, enter a rate for each of your shipping classes.
Use the No shipping class cost field to set the rate for products that do not have an assigned shipping class.
Related Articles
Creating and modifying tax classes
A tax class is a collection of tax rates. For example, a tax class called Standard Rates may comprise all the regular GST, PST, and HST sales tax rates per Canadian province/territory. Whenever you add a new product to your store, you'll assign it to ...Managing shipping zones
A shipping zone is a geographic region in which you offer a certain set of shipping methods. You can create your own shipping zones in Breadstack. When a customer places an order with your store, Breadstack matches them to one of your shipping zones ...Setting up service departments
Assign your agents to departments based on the types of questions you commonly receive from customers. For example, you might have a department dedicated to helping with Shipping and Returns questions. You can set departments to appear on your chat ...Getting started
Welcome to Breadstack - we're happy you're here! This guide will take you through the process of setting up your workspace. Setting up your store Sync your eCommerce platform with Breadstack. This first step connects Breadstack to your store' website ...Setting up your Shipstation account with Purolator
Purolator, Canada's leading freight and parcel provider, integrates with ShipStation to help Canadian users streamline shipping by obtaining rates, creating labels for domestic and international shipments, and handling regular, dangerous, and special ...